One question I get asked frequently by my non-tech inclined friends is how to stream video from their computer onto their HDTV? The answer to this question is sometimes complicated and often leads to blank stares on the questioner’s part. Today’s review item may help solve this problem.
Veebeam is a company that I met at last year’s Pepcom trade show and they were kind enough to send us a sample of their Veebeam HD. This device works by streaming high definition video via Wireless USB. Not to be confused with AppleTV, GoogleTV or Roku; it’s not so much a media center as a media streamer.
According to their website – Wireless USB creates a secure point-to-point connection between your laptop and your TV. WUSB is more powerful than traditional Wi-Fi because it offers more bandwidth, better security and less interference over short distances. One caveat to this setup is that the TV and computer need to be in the same room and in direct line of site.
It being marketed for laptop use but can be used in conjunction with a desktop computer if it is near the Veebeam HD receiver.
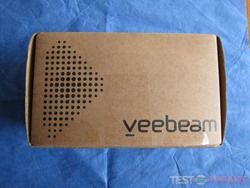
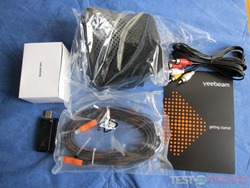
The Veebeam HD unit sent to us for review arrived in a plain brown cardboard box covered with the Veebeam logo; no fancy product images or features on the box. Found inside the package is the Veebeam HD receiver, USB dongle, power adapter, Quickstart guide, HDMI and composite cables.
The Veebeam HD setup is primarily comprised of a USB transmitter and receiver, which attaches to an HDTV.
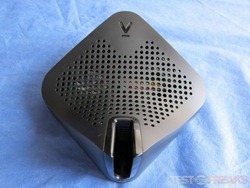
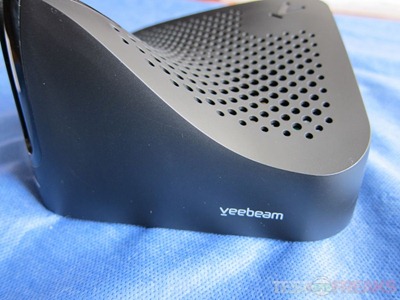
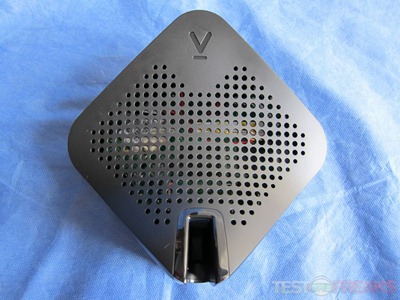
The largest component is the receiver measuring 12 cm x 12 cm x 8cm and is composed of matte black plastic. It has an unusual diamond shape, making the Veebeam HD stand out in your home theater setup. It seems Veebeam went with this style to keep this passively cooled device at a maximally ventilated; one drawback to the Veebeam HD’s shape is it can only sit atop of your home theater setup, not neatly tucked away.
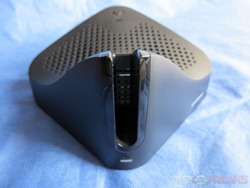
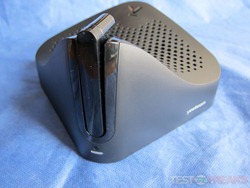
The front of the device is the highest point of the receiver. Besides housing the antenna it also is the location of an LED power indicator, IR receiver port and USB dongle storage slot. To the right of this area is the Veebeam logo.
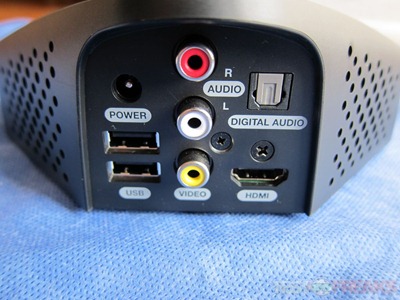
Looking at the back of the Veebeam HD receiver we find audio and video connections. The outputs include HDMI, optical audio and composite AV. In addition there is an AC connector and two USB ports. According to Veebeam these two USB ports seem to be designed for future “webcams and external hard-drives” use but currently are disabled. Hopefully Veebeam will enable them in the future with a firmware upgrade.
To keep the receiver from overheating, Veebeam placed numerous ventilation holes on the top and rear of the unit. Oddly there is no power switch on this device making it an energy vampire. Four rubber feet on the bottom keep the receiver from sliding around.
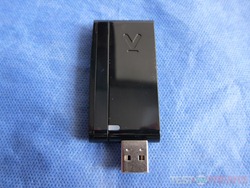
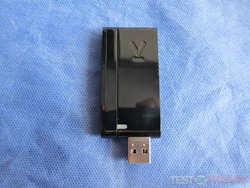
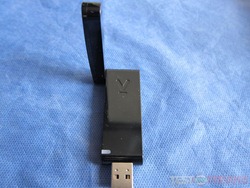
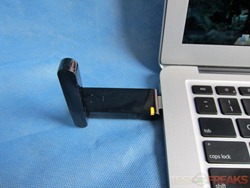
The transmitting USB dongle is wider than a normal USB thumb drive due to its side antenna. The dongle due to its size may tie up two USB ports on some machines. It is composed of piano black plastic with the Veebeam “V” logo; there is a LED next to the USB connector.
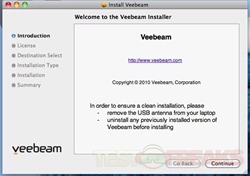
This dongle is designed to work with Mac OS X (10.5, 10.6), Windows 7, Vista and XP. It wireless transmits the broadcast signal from the computer to the connected television. Veebeam does not include software with the system but it is available for free download off their website.
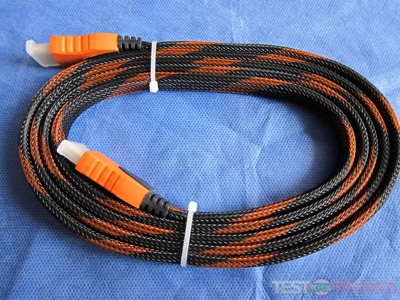
Besides the transmitter and receiver, Veebeam includes a very sturdy HDMI cable. The composite cables can be used to connect the receiver to the TV as well.
This wireless system has a range of approximately 20 feet with a direct line of site.
Specifications:
Features:
-Streams Netflix, Hulu, BBC iPlayer, YouTube and other Internet sites
-Built-in wireless PC to TV link
-Easy to set up, easy to use
-Compatible with Mac OS X (10.5, 10.6), Windows 7, Vista and XP
-Ideal for laptops
-Use laptop keyboard & track pad to control playback
-Plays 1080p HD movie files
-Optical audio output for surround sound
-HDMI connector
-Displays photos and desktop in HD
-Two (2) USB ports for future support of webcams and external hard-drives
What’s included:
-Veebeam HD Player
-Veebeam Wireless USB adaptor
-AC/DC Wall/Mains power supply (plug type determined by shipping location)
-Composite audio/video cable
-Quick Start Guide
-Veebeam HD Software (download required)
Video/Audio/USB output: Composite A/V, HDMI, Digital Audio/TOSLink, Two (2) USB Ports
Screen/input resolution: 1280 x 1024 – Desktop, 1280 x 1024 – Photo, Video
Max output resolution: 480i – NTSC/PAL, 1080p – HDMI
A/V containers: If you can play it on your PC, you can play it on Veebeam.
Capable of supporting: AVI, MKV (Matroska), MOV/M4V (Quicktime), MP4, ASF/WMV
(Microsoft), MPG (MPEG2-PS/TS), Flash, AVCHD.
Video decoders: If you can play it on your PC, you can play it on Veebeam.
Capable of supporting: H.264/AVC, MPEG4 (part 2)/Xvid, WMV (VC-1), MPEG-2 , VP6/7/8, Theora
Audio decoders: If you can play it on your PC, you can play it on Veebeam.
MP3 (MPEG1 Layer 3), AAC, AAC+, Dolby Digital/AC-3 (downmix), LPCM (AIFF, WAV), WMA, DTS (downmix), FLAC
Photo formats: Screencast | JPEG, BMP, GIF, TIFF
Power: 110-120VAC (60Hz) or 220-240VAC (50Hz) 10W at 12VDC (20W max)
Wireless: Ultra-Wideband @>150Mbps constant rate
DRM: None
Systems requirements: 2.2 GHz or greater Intel Core 2 Duo or Intel i3, i5, and i7
2 MB cache memory
2 MB RAM
Mac OS X (10.5, 10.6), Windows 7, Vista and XP
Protocols Used: DLNA, UPnP and Wireless USB Compatible
Footprint: 120mm x 120mm x 80mm
System Requirements
-OS | Works with Mac OS X (10.5, 10.6), Windows 7, Vista and XP
-CPU | Ideal for laptop computers (requires 2.2 GHz or greater Intel Core 2 Duo or Intel i3, i5, and i7). Not compatible with Netbooks.
Setup requires downloading and installing the OS specific Veebeam software obtained from their site. Once this is completed, plug the receiver into the HDTV via either AV connection type and the USB dongle into a computer. Keep in mind the minimum system specs required by the host computer to use the Veebeam HD – a 2.2 GHz or greater Intel Core 2 Duo or Intel i3, i5, and i7.
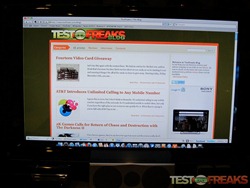
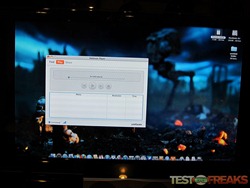
With the Veebeam software is actively running in the background the computer’s desktop should appear on the TV. Screencasting mode is the default view as is analogous to a mirrored monitor setup; one where the TV is the second monitor. The drawback to setting is a slight lag between the computer and TV.
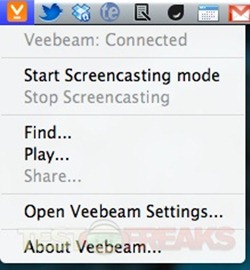
The other viewing option is the Video Play Mode and this can be enabled from the Veebeam icon found on the Mac menubar or the Windows taskbar. In this mode the video is transmitted to the TV in full screen mode while the laptop desktop can continue to be used normally. The caveat to this mode is the inability to watch web streamed video; only self-contained video files can be played such as avis, mp4s, mov, etc.
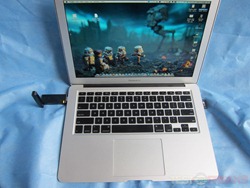
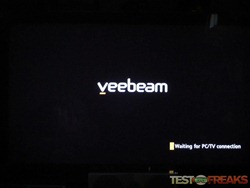
For testing I use a 2010 13” MacBook Air and a Core 2 Quad 9400 Desktop running 64 bit Windows 7 Enterprise. Software installation on both machines took less than a minute. Once the Veebeam software was running and the dongle was plugged into either machine it took less than 15 seconds for the Veebeam HD signal to be transmitted to the television.
The Veebeam HD should not to be confused with a media center style device like an Apple TV or Roku. There is no native media center; although the host machine’s built-in Windows and Mac media center options can be used to remedy this issue.
One important thing to note is that videos still require the proper codecs to be installed on the computer for proper playback. Initially the desktop PC I used could not playback MPEG-4 and xvid files because I did not have those codecs installed. After downloading and installing the K-Lite Codec pack everything played readily. I was able to play files from mp4s to Blu-Ray ripped mkvs without a hitch.
The proximity of the transmitter and receiver needs to be less than 20 feet for uninterrupted video. If there is some blockage such as a person standing between the two, then the video will be lost. Wireless USB is very good at transmitting heavy bandwidth data but does have this direct line of site issue.
When the Veebeam software is actively running on a Windows 7 system it defaults the system from Aero view to basic. On the Mac there was no change in the viewing mode.
The screencasting mode is nice and can be used as a presentation mode for conferences; just take the couple second lag into account when giving your talk. The other issue is that the mirrored screen on the television ends up cropped on the side and the resolution tends to be incorrect as the image is based on the laptop’s native resolution not the HDTV’s.
Controlling the Veebeam HD is performed from the user’s computer; there is no remote for this device. This is one of the primary reasons that the Veebeam HD is not meant to be a media center device. It is more of a media streamer; designed for running media easily off laptops for home viewing or presentations in a work setting.
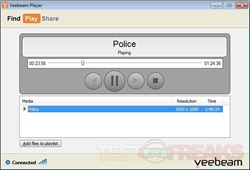
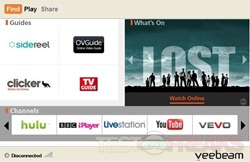
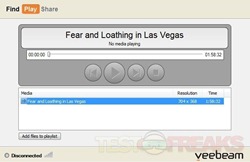
The Veebeam software is a work in progress. Right now it is fairly simple with minimal options. The Veebeam Player has three sections found on the top of the program that includes Find, Play and Share.
From the Find screen the Veebeam Player software will list “channels” which are basically links to specific sites such as Hulu, Youtube and BBC iPlayer that will load to your default web browser. This is a handy way to gather all the video content providers in one spot but also seems a little crude, as it is basically a collection of weblinks. I would have preferred opening a dedicated window for viewing each site.
The Play screen is used for Video Play Mode; simply choose a file you wish to stream via dragging it onto the play list or using the “Add files to playlist” button. To activate this mode you will need to turn off the screencasting mode in from the taskbar icon in Windows or the menubar on the Mac.
The Share button seems greyed out and I was unable to determine its function. My guess is that Veebeam will eventually activate it to integrate with social networking platforms. There was no mention of its function in the downloadable user manual.
Unlike Boxee and GoogleTV, the Veebeam HD has access to all Internet content since it is coming directly from your computer. This means Hulu, YouTube, Netflix, and other dedicated network websites are all available to be streamed from the Veebeam HD. There are no DRM issues to worry about when using the Veebeam, if you can play it off your computer then you can watch it on your TV.
Conclusion:
The Veebeam HD is one of the first devices to take advantage of wireless USB to stream heavy bandwidth content including 1080P video. While it performs that function well it does still have a few rough edges. It requires a direct line of site between the USB transmitter and receiver which must be within 20 feet or less of each other. Any object standing between these two points will break the connection. Also the system needs to be controlled via the computer transmitting the signal; there is no remote control to use.
Besides the hardware caveats, the Veebeam HD software is rather simple in its scope and power. While it does a great job with screencasting and video to play mode the options within the software are rudimentary. Thankfully Veebeam can and will improve the software and firmware of the device to address some if not all of these issues. The eventual activation of the included USB ports will be a welcome addition.
While the Veebeam HD is not designed to be a media center device, it does do something most other devices can’t – Wireless HD streaming. It is perfect for machines without an HDMI connection as the Wireless USB replaces that output and the receiver can connect to all HDTV to receive this HD signal. Currently the Veebeam HD is a work in progress, with some software and firmware additions it can become a must have device for the one’s home theater.
Pros:
+Wirelessly transmits 1080P
+Works with PCs and Macs
+Access to all web based video content
Cons:
-LINE OF SIGHT only
-No remote control
-Software is rudimentary
-Does not work as a desktop extender for computer usage
| Grades: | |
| Overall |  |
| Design |  |
| Performance |  |
To learn more about our review policy please visit this page HERE.

