Almost everyone these days use or have access to a wireless network connection set up at their workplace or home. Your router’s wireless access is connected to a particular WiFi channel that connects you to a network.
If you live in a densely populated area or apartment building, you may experience frequent network dropouts, disconnection issues, timeouts, and incredibly slow internet speed.
These issues are usually caused when a large group or number of individuals attempt to connect to the internet. This creates an overload of WiFi signals using the same channel.
You can, however, get the best possible connection in your area by switching to another network channel that is uncongested or has significantly fewer users.
What is a WiFi channel?
A WiFi channel is a small band set within a larger frequency band and a specific radio wave frequency range that your WiFi router utilizes to transmit wireless signals.
Your router can use one of two WiFi frequency bands i.e., 2.4GHz, 5GHz, or both if you use a router with a dual-band.
However, there is a small catch: in most cases, in order to have the best browsing experience, it is highly recommended to make use of these WiFi frequency bands over the other or one channel over the others.
There is a reason for this: there is a tradeoff – i.e., an exchange that occurs as a compromise – between WiFi speed and coverage.
One of the primary differences between the 2.4GHz WiFi frequency band and the 5GHz band is the WiFi speed, as well as WiFi coverage they provide. This is because 2.4GHz WiFi transmits signals at a low frequency. This enables the additional extension of WiFi coverage, which quickly penetrates solid objects such as your furniture and your home’s wall.
On the other hand, 5GHz WiFi frequency, which is much higher, supports much faster speeds, thus allowing you to download and upload files faster. This frequency band offers much better performance.
How Do Channels Work?
When picking a WiFi channel, it is crucial to ascertain whether you are using a 2.4GHz or 5GHz band. If you are using the 5GHz band, all you need to do is to search for the best channels that are not being used. There are many channels in the 5GHz band, so you are at liberty to take your pick.
If you are using the 2GHz band, however, you only have access to 11 channels. The channel you pick will end up overlapping with two channels that are above and two that are below it.
For instance, if you put your computer on channel 3, this channel overlaps channels 1 through 5, making for a pretty clouded WiFi space, irrespective of whether or not each device has its dedicated WiFi channel.
The best way to confront this situation is to go for channels that do not overlap. You can achieve this easily: make sure every one of your devices is on channels 1, 6, or 11. And they naturally will not overlap with each other, thus making it easier to keep the airways very clear.
Top 10 things in your home that block or interfere with WiFi signals
The following are the top ten things in your home that block or interfere with WiFi signals:
1. Separate wireless networks in your home
2. Your neighbor’s network
3. Walkie-talkies, baby monitors, and other radios
4. Bluetooth
5. Thick timber walls
6. Microwave oven
7. Masonry and concrete walls
8. Your TV
9. Water
10. Metal and floor heating
You can perform a WiFi analysis to help you determine your router’s best position.
How do I find the best WiFi channel?
It is a relatively common occurrence for multiple WiFi routers to simultaneously broadcast on a non-overlapping single channel in apartment buildings, public places, densely populated areas, and offices.
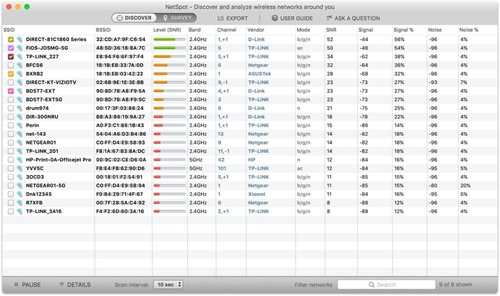
If you find yourself in this situation, the best option for you is to use a WiFi channel scanner app or a WiFi analyzer to find the best, least-crowded, and non-overlapping channel.
Follow these steps below:
Step 1
Understand RSSI and Noise Values: You may not be able to determine the non-overlapping channel to switch to if you do not have a full understanding of noise values and RSSI.
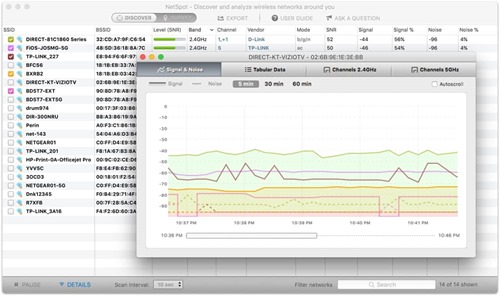
RSSI (Received Signal Strength Indicator) indicates how well a WiFi-enabled device can receive network signals from a router. Noise suggests the level of interference caused by other signals and how it affects the particular connection.
RSSI is usually indicated in negative numbers: the closer those negative numbers are to zero, the better. Zero means that no WiFi signal strength has been lost during transmission. For instance, an RSSI of -40 is much better than -50.
With noise, your goal is to get as far away from zero as possible, meaning than -80 is better than -70.
Step 2
Evaluate Signal-to-Noise Ratio: There are two values you need to combine to enable you to calculate the Signal-to-Noise ratio. This is a measure that is used in engineering and science, which compared the level of the coveted signal to the level of background noise.
By subtracting the value of noise from the RSSI, you can calculate the Signal-to-Noise Ratio of a WiFi connection.
In other words, RSSI – Noise = SNR.
Based on the parameters that guide excellent WiFi connection,
-40 – (-80) = 40.
This is a positive number; the higher the number, the better WiFi speed you will experience.
Step 3
Compare Signal-to-Noise Ratio Before and After You Change Your Channel: Afterwards, switch between channels 1, 6, and 11. It would be best if you went for the one that allows you to attain the highest Signal-to-Noise Ratio.
How Do I Change WiFi channel?
Most wireless routers possess the same structure of settings, even though a few have slightly different names. Some routers give room for admin panel access via a unique URL. Find out if your router offers such permissions.
Log in using your admin details. If you have never done so or changed yours, the default username is ‘admin,’ and the default password is ‘password’ or ‘admin.’
You can find the WiFi channel setting under ‘WiFi’ or ‘Wireless,’ though for some routers, users may have to check under ‘Advanced Settings.’ Look under the ‘General’ category if there are several subcategories.
You will see ‘WiFi Channel,’ ‘Wireless Channel,’ ‘Control Channel,’ or ‘Channel.’ Select the desired channel, click ‘Save’ or ‘Apply’ to change the setting.
Conclusion
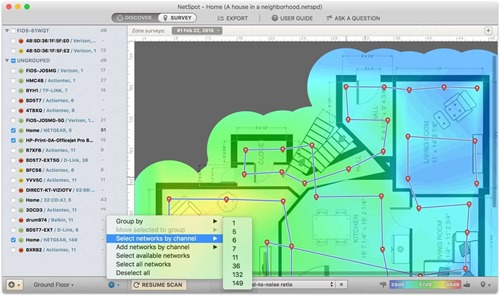
Using the WiFi channel scanner app from NetSpot – which has highly comprehensive survey features – can help you to checkout or detect wireless networks. This makes it easy for you to spot any channel overlap so that you can make necessary changes.


