Installation and Testing Continued
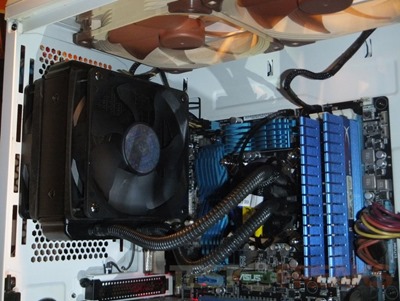
I ran two sets of tests on the Seidon, the first was with just one fan and then with the two fans to see how much of a difference there was in performance. Installing the second fan is easy, just the four screws, dampener and the fan itself. This is where the fan extension comes into play, you use that to connect both fans to your motherboard via the CPU PWM connection.
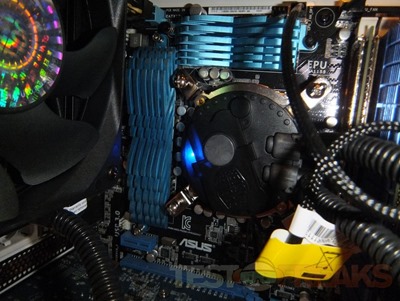
The pump/water block combo does have a nice blue LED in it when the system is powered up and running.
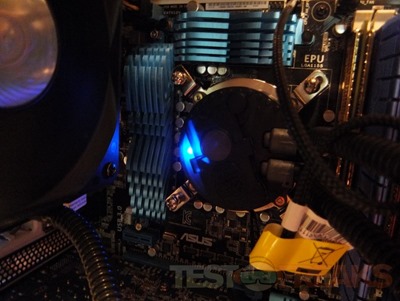
This picture is in the dark, or at least with less light. In the dark the blue LED looks nice in the case.
Installation was fairly straight forward but I have to admit the instructions could be a bit clearer or more detailed. Two things ‘confused’ me about the installation process, and that was exactly which screws to use and then the placement of the vibration dampeners that were included for the fans.
Traditionally a dampener is used between the case and the fan, but there’s two included but only one place the fan comes into contact with the case so this led me to believe the dampeners were to be used with the radiator and not the case. I was originally installing it with one of the dampeners on the case side where the Seidon mounts but then I remembered there was two of them. So with two you would use them on each fan where it touches the radiator. I would think a third should be included so you could have one where the fan touches the case as well to further reduce any vibrations. The instructions don’t mention in writing where the dampeners go but there is a diagram that’s fairly easy to miss that mentions the part letter for the dampeners. I missed it several times when I looked for it actually, it wasn’t until I really looked for the part letter did I finally find it in the instructions.
The next small issue is the screws fro mounting the Seidon and the fans, included is two bags of screws very similar and very close in size one set being 30.5mm and the other being 33.5mm, 3mm isn’t much at all really so you can see where there might be some confusion.
The last issue is screws again, and it concerns which ones were to be used with actually mounting the brackets to the water block and pump combination piece. There are pictures of the screws and they are labeled in the instructions but you really can’t tell which is which from the pictures. I just tried both sets and clearly one didn’t fit at all as the heads were to large to use with the block. The only real fix would be to actually label the individual bags of screws so the end user knows exactly which screws to use for what part of the installation process.
These aren’t big issues but this could cause un-needed frustration for someone who isn’t exactly technically inclined or someone who doesn’t have much experience when it comes to installing things like this. I just think the installation instructions could be clearer and more detailed.
Onto the testing.
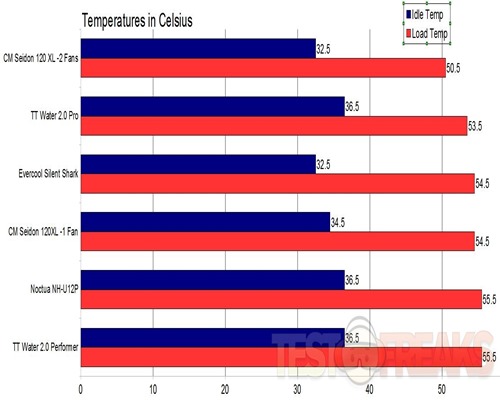
Ambient room temperature was 24.5C (+- .3c). I used Orthos Stress Prime to get load on the Core i7 2600K. I used CoreTemp to monitor and log the CPU temperatures, after which I then averaged them out to get one single temperature for the following graph.
I tested the Seidon 120XL using one fan and two fans to see how the performance changed.
I’m comparing the Seidon 120XL against the Noctua NH-U12P and the Evercool Silent Shark that I just reviewed and also against the Thermaltake Water 2.0 Performer and Pro liquid coolers.
Two fans are obviously better than one, but I think we knew that already but as you can see we have a five degree difference between the Seidon with two fans and the Thermaltake Water 2.0 Performer.
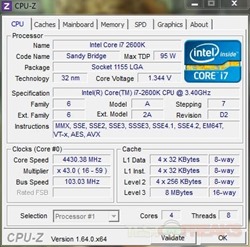
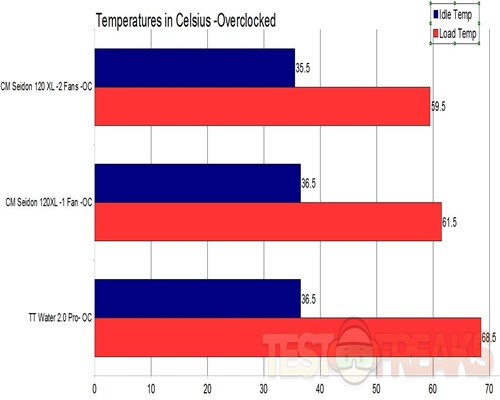
I also overclocked my CPU from the stock 3400Mhz to 4400Mhz and ran the same tests, but only with the Seidon 120XL with one fan and two fans and Thermaltake Water 2.0 Pro which uses two fans all the time.
So as you can see the Seidon handles the overclocked CPU very well, much better than the Water 2.0 Pro does.
The last thing I want to mention here is the noise levels.
The first thing I noticed when I installed the cooler was it was quiet, very quiet actually, I thought the Noctua NH-U12P cooler and fan was quiet that I has installed before the Seidon, but this thing is virtually silent, it actually made my system quieter.
When I installed the second fan the noise level did go up slightly but no more than when I had the Noctua cooler installed. The fans are connected via PWM which means they can be controlled with your motherboard as the need arises. You can connect both fans to one header via the supplied adapter which would be the ideal connection as you would connect it to the CPU fan header on your motherboard so both fans would adjust automatically as the need arises.
Even under load I really didn’t hear much of a noise difference at all, so either way the Seidon and its fans are very quiet overall.
When overclocked the fans do get a little higher in noise level but not much at all, more than bearable.

5 comments for “Review of Cooler Master Seidon 120XL CPU Water Cooling System”