Testing and Usage
Features
Let’s next talk about some of the features of the BDS 580 (and afterwards the speakers), it’s certainly not light in that area.
It supports both 5-inch (12cm) or 3-inch (8cm) BD-Video (single or double layer), DVD-Video, DVD+R/+RW, DVD-R/-RW, CDDA (CD audio) and CD-R/RW discs. I can’t think of anything else I’d likely to want to put into it’s slot. The slot itself grabs your disc gently, and after a short wait, will let you know what’s you’ve given it. It ejects it again softly too. If you’ll leave the disc ejected for a little while, it’ll automatically take the disc back again, I assume to protect it. When there’s a disc in the unit, you’ll see an eject “button” light up which you lightly touch. When there’s no disc, there’s no button.
Audio formats supported are Dolby® Digital, Dolby® Digital Plus, Dolby® TrueHD®, DTS Digital®, PCM, WMA (DRM-free version only): WMA9, CBR @192kbps, VBR @355kbps, MP3: 32kbps – 320kbps bitrates, including variable- bitrate encoding. That should cover most eventualities.
The still image format supported is the rather standard JPEG.
Front-panel
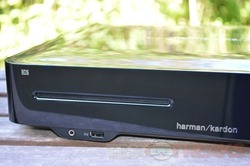
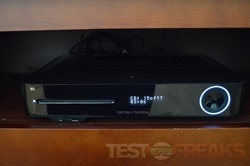
The front of the unit is quite sparse. You’ve the disc slot at the left hand side, with a discreetly placed USB port underneath allowing you to connect popular portable devices as well as USB sticks to play your favorite tracks. Next to this port, you’ll find a headphone socket, which doubles as socket to plug the testing mic into when you do the initial set-up. Apart from that, you’ve a big white illuminated dial which is both a volume control and a standby/wake button. Just above the top panel is a NFC logo which is a quick way to pair devices which support this feature.
Rear
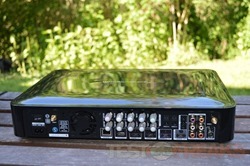
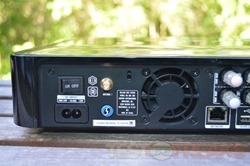
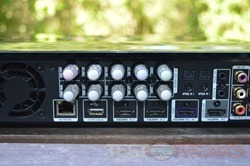
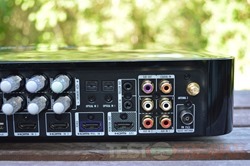
There’s seemingly lots of things to look at on the back of the unit, hardly surprising as it’s not just a Blu-ray player of course. You’ve got the On/Off switch and below the power socket which is a standard type. Then there’s the WIFI antenna connection and the fan. Next are the speaker connections, and below Network, USB, 4 x HDMI ports. You’ve also optical, remote in and trigger sockets. Sub Out, Coaxial in, 4 x AUX, a 2nd WIFI antenna connection and finally FM radio antenna. My main gripe is with the speaker connections – whilst they are color-coded for ease of connection, I found it a bit fiddly to wrap the cables round the terminals but you do only need to do this once. The rear USB socket can be used to power ChromeCast, if you have one of these dongle devices.
Menu
Once you’ve connected speakers you’ll want to start exploring all the different options. Perhaps the first options you’ll look at are the settings, of which there are many to learn. The printed manual doesn’t describe everything, so you’ll probably need to download the full version from the Harman Kardon website.
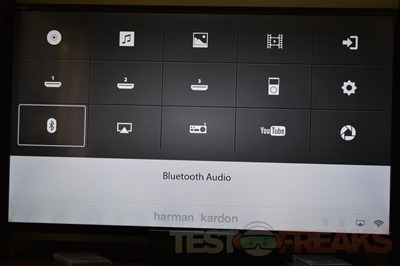
The first icon is “Disc”. You’ll select this to play a CD, DVD or Blu-ray of course.
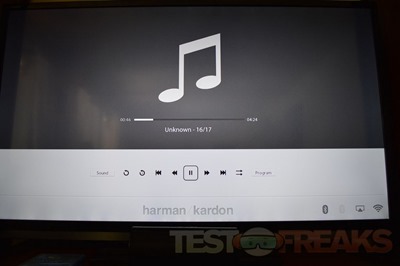
The next icon is “Music”. From here you can play MP3, WAV and WMA tracks which are located on remote devices or a USB stick plugged into the front of the machine. Once you’ve got an MP3 playing, you can happily navigate out of the option and look at photos for instance. The remote doesn’t unfortunately enable you to skip tracks if you aren’t in this section. I was able to access music from my NAS without any problem at all. The display on the front of the unit simply displays “Music” rather than the name of the track.
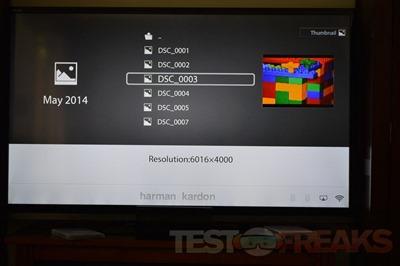
Similarly to the music track, the “Photos” icon allows you to look at your photo collection from any connected device including USB stick, your NAS, even a DLNA enabled mobile. A useful thumbnail and resolution details of the image you’ve selected appears before you select it to make it full sized. You can also change the view from list to thumbnails (limited to 8 images at a time). This seems pretty quick even on my NAS connected over WIFI. You can also zoom in and rotate images, and the response rate is nice and fast even with larger images.
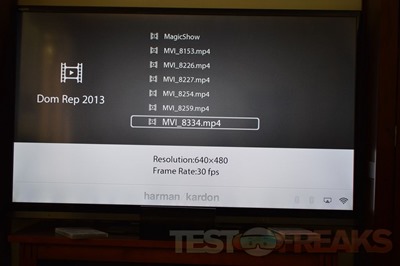
“Videos” allows you to access your home movies or other content which you might have stored on a media server, USB or on your mobile. Most of my movies from my NAS played perfectly well, although some did seem to have distorted the size of the picture – leading to very short bodies on everyone. I also had some problems accessing videos from my Galaxy S4, using DLNA sharing, getting a message to say the format wasn’t supported. After this failure, I also got a hour glass symbol which would only go away by clicking the back button on the remote. To be honest I had similar problems with my previous LG Blu-ray player, and my Aquos TV also is a bit hit and miss. I think this is just due to the variety of different devices I have captured video on, and not problems with the units themselves.
The next icon is “Aux”. From here you can flip between Optical 1 &2, Stereo LR1 & 2, Coaxial and TV. The only one I really have cause to use is Optical 1, which is connected to my Optical port on the TV – so that I can get sound through the BDS880 when watching normal TV. The AUX button on the remote also cycles between these options.
The next 3 icons are “HDMI 1 – 3”. Currently I have my ChromeCast plugged into HDMI 1, so this is the only one I’m using – mainly for NetFlix. If you select a HDMI channel which has nothing connected, you’ll get a message on the display saying “No Signal Input”. The HDMI channels can also be accessed by using the remote, with HDMI being marked specifically for ROKU (also works for MHL – Mobile High-Definition Link devices), and HDMI 3 for Apple (TV).
Then you’ve the “iPod” icon. If you’ve connected an iPod/iPad/iPhone to the system, then this will allow you to listen to tracks. I don’t have any of these devices but through iTunes on my MacBook Pro I was able to pair and play through the system without any issues (using AirPlay).
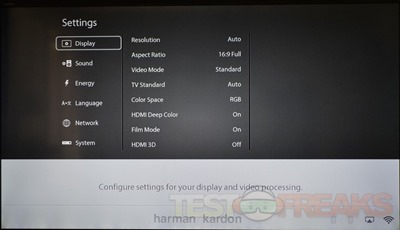
“Settings” includes everything you need to tweak the display, sound, energy, language, network and system. I won’t go into each, I found most quite obvious and self explanatory, as well as well laid out. In the Network section you’ll find the options to connect to your WIFI, and this is quite painless. You’ll need to do this before you can access any content via apps or stream using ChromeCast for example.
The “BlueTooth” icon duplicates the same button on the remote, and allows you to hear content being streamed from any mobile device enabled with BlueTooth. A good use of this is services such as Spotify or radio apps such as TuneIn. It works well, with my S4 having no problems at all pairing.
The “AirPlay” option allows you to listen to content from services such as iTunes. When you launch iTunes, select the Airplay icon which will now divert content to the HK system instead of your laptop, iPod etc. I’m not a huge fan of iTunes, so have only briefly tested this. It seems to work just fine.
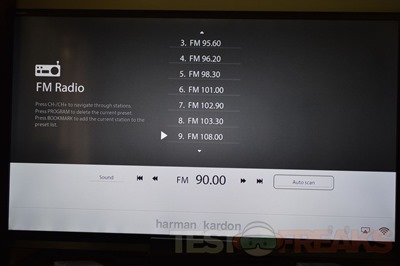
The next icon is the FM Radio. Supporting a fairly standard frequency range of 87.5MHz – 108.0MHz, you’ve also 30 presets and the auto-preset function to find and save all available stations. The included FM aerial only managed to pick up a handful of stations for me, but there are better options if you are into radio – the vTuner app (or Pandora in the US, Australia or NZ), accessible from the home menu or streaming from a radio app via BlueTooth on your mobile device (such as TuneIn).
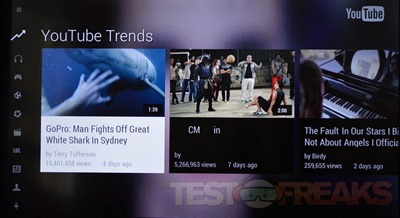
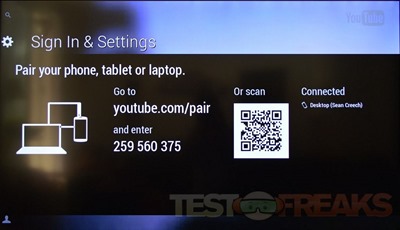
The next option allows you to access content from YouTube. It’s quite a comprehensive app with lots of quick access content such as trending for different categories from music to education. You’ve of course a search option, although why it’s not the first thing to see I’m not sure. YouTube on devices which need remote controls tend to be tedious to operate so it’s welcome to see an option which allows you to pair YouTube on your device with YouTube on your mobile or Tab. By going to youtube.com/pair and entering the code displayed on your TV, you can now control the content from your mobile device. Much faster. If entering a 9 digit code is too much trouble for you, simply scan the code displayed on the screen. Personally I prefer entering codes. I had some initial problems getting the content to work when paired with my browser on my Mac – with all videos saying they could not be played but that glitch seems to have fixed itself. For those that don’t have ChromeCast or the like, this pairing option is great.
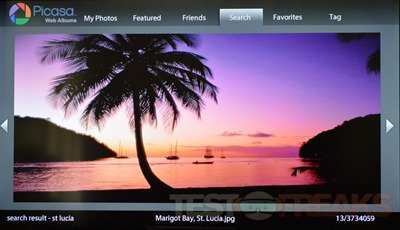
Picasa is the next icon. I’ve not used this service much in the past, but from what I understand you can browse publicly available photographs, as well as your own once logged in. I’ve run a few searches and it works fine, allowing you to display large images on the TV screen.
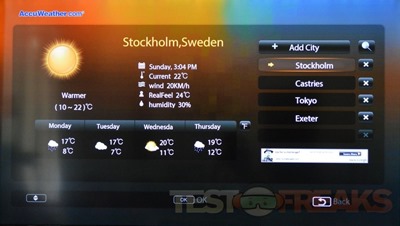
The last but one icon is for AccuWeather. With most of us having some kind of weather app on our mobiles, it’s probably not that exciting but none-the-less gives you the option to see the weather for any cities that may be of interest to you. Some countries are rather more limited when listing towns than similar apps on your mobile, but you’ll normally find one quite close to your required destination.
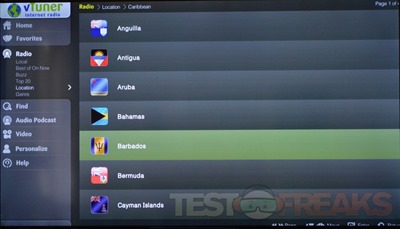
Finally, there’s the VTuner app. This will be Pandora if you are in the US, Australia or Canada. These apps allow you to search for and listen to internet radio stations as well as podcasts from all over the world. You can add some to your favorites so that you can access them quickly next time. I found VTuner had a good selection of content and worked flawlessly.

2 comments for “Review of Harman Kardon BDS 880 Home Theater System”