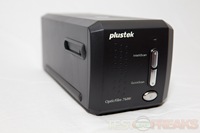
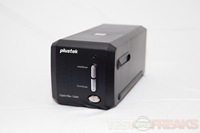
Today we are reviewing the Plustek OpticFilm 7600i SE scanner. It is a negative film and slide scanner. For you completely digital people out there I’ll explain: Film is an analog way of capturing an image. Instead of a digital sensor collecting photons there is a light sensitive emulsion onto which the light is shone. Then, through a chemical process, the film is developed to create the final image. From this image we can make prints. To get the image into the computer it has to be scanned. That’s what we have film scanners for.
I mostly make pictures using my DSLR or a digital point-and-shoot now-a-days. However, I still have some old film cameras lying around that I really like to use from time to time. I also have a lot of old negatives and slides that I would love to digitize so I can use them as easily as I use my digital-from-the-start images. I would essentially have the same workflow to make digital albums, send for prints, make photo books or publish on the web. That would be nice!
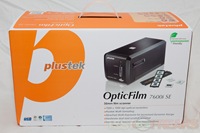
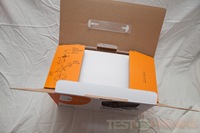
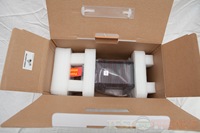
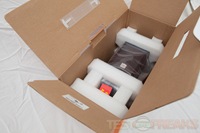
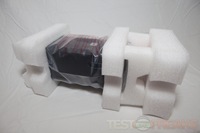
Unboxing
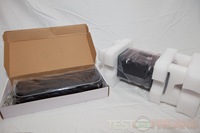
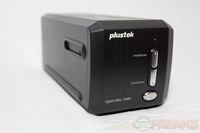
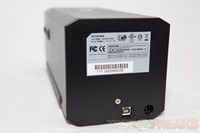
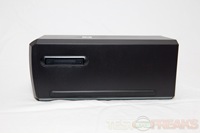
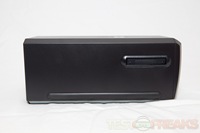
The scanner comes nicely packaged in a large box. Let’s begin by unboxing it.
Specifications:
The Plustek OpticFilm 7600i SE is an environmental-friendly high resolution scanner coming with more improved quality and greater power saving. OpticFilm 7600i SE is a dedicated 7200 dpi film scanner, which makes scanning easier, more efficient, and the unique light source gives images more vivid effect and precise color rendering.
Users can benefit from SilverFast’s intelligent automatic functions which help to make the process of various adjustments much easier. The unique SilverFast’s Multi-Sampling eliminates noises efficiently with auto alignment, plus exclusive iSRD feature for dust and scratch removal.
Opticfilm 7600i SE is ideal for photographers, photo amateurs, image freelancers, and those who would like to access to the world of digital image processing.
Interface: USB 2.0
Technology: Color CCD image sensor
Hardware Resolution: 7200 x 7200 dpi
Dynamic Range: 3.5
Max. scanning area: 36.8 x 25.4 mm (1.45 “x 1”) for negative film
Preview Speed: 7.57 seconds for slide and 8.01 sec for negative film *without calibration time
Scan Speed: 3600dpi: Approx. 32.14 sec (multi-sampling ON), 7200dpi: Approx. 56.82 sec (multi-sampling ON) *under 24bit true color
Hardware Multi-Exposure on negative film: Yes
Multi-Sampling: Yes
Infrared Function: Yes
Color Depth: 48 bit/pixel
Scan Mode: Single Pass
Lamp: White LED
Dimensions (D x W x H): 272 x 120 x 119 mm / 4.73″x10.7″x4.7″ (scanner only)
Net Weight: Approx. 1.6Kg / 3.5 lbs (scanner only)
Film Holder: Mounted slides, up to 4 slides, Filmstrip, up to 6 frames
Infrared: BUILT-IN
OS Support: Windows 2000, XP, Vista, 7 & MAC
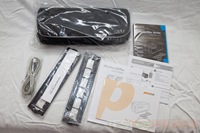
Accessories:
Padded Carry Bag
Negative and Positive film holder
Plustek Setup/Application CD-ROM
SilverFast CD-ROM
Quickguide
USB cable – 150cm (59.05”)
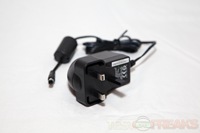
Power Adaptor:Output 15V, 1.0A
System Requirements:
CD-ROM Drive
One available USB Port
512 MB RAM
500 MB free HDD space
High Color graphic card (VGA or higher)
Windows:
CPU: Pentium III or faster CPU
Microsoft Windows 2000 / XP / Vista/ 7
Macintosh:
CPU: PPC G4, PPC G5, Intel
MAC 10.3.9 and higher including Leopard
Setup
Setup is very easy, just plug in the power cord and connect the scanner to the computer with the included usb cable.
Software and Installation
There are two different versions of the OpticFilm 7600i: SE and Ai. The one we have for review is the SE version. The difference between the two is the included scanning software; SilverFast. See here for a comparison of the SE and Ai versions of SilverFast. The biggest difference is that with the Ai version, the scanner can be color calibrated.
The software consists of two parts, the scanning software called Silverfast and the scanner driver. Setup of the scanner driver is straight forward. Silverfast setup however didn’t go as smoothly. The installation program on the included CD said “Installer Config File broken or not available”. I finally managed to get the software installed by running an install program that I found in the \en\SilverFast directory.
Workflow
My workflow when scanning basically looks something like this:
- Mount film strip or slides into the film holder and then put it in the machine.
- Push the IntelliScan button to start the scanning software.
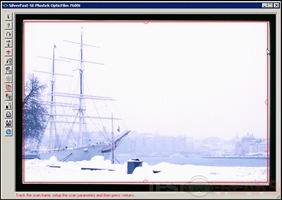
- Prescan the image to get a preview of what the final image will look like.
- Adjust image parameters and scan settings. Most important to me are image cropping, levels, white balance and output resolution.
- Scan the image to file.
Now I’ve got an original image that I can put through any other workflow. I can put it into Adobe Lightroom or another imaging software. Actually the image I have now is a sort of digital original much like the raw files I get out of my DSLR. The processing is not really finished yet for most applications and I will need to work with it some more to make a print out of it or publish it on the web.
Scanning Using Scanpilot
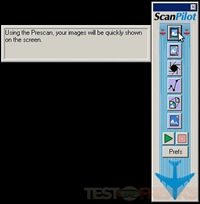
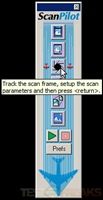
The Silverfast software contains a helper window called Scanpilot that guides you through the scanning process. It really helps to get you up and running in no time.
First, start the prescan to get a preview image of what the final scan will look like.
Set the type of film.
Crop the image by tracking the edges of the image.
Press the next ScanPilot button to auto-adjust image parameters.
Set the image name and output resolution.
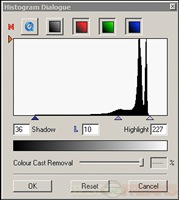
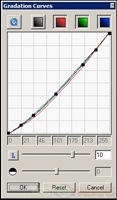
If necessary, modify levels and curves using the top row buttons.
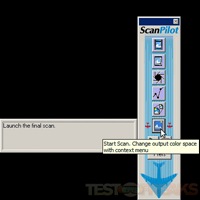
Now we are ready to launch the final scan. Press the scan button.
Then, choose the file type, quality and filename. You can choose between JPEG and TIFF. TIFF is lossless but requires a lot of space on your hard drive.
After the scan has finished the image is presented in an image viewer.

Canon EOS 5, EF 50mm f/1.2L, Fujichrome Provia 100F
I found the Scanpilot feature to be very useful to get up and running quickly.
Scan Quality and Resolution
I have tested scanning slides and both black and white and color negative film. The overall quality is very good. I have mostly used the scanner at 2400 or 3600 dpi which is plenty for most applications. If you scan at 7200 dpi you can print the image at a 24 time magnification at 300 dpi. So a scan at 7200 dpi would let you print images that are almost one meter wide.
Canon EOS 5, EF 50mm f/1.2L, Fujichrome Provia 100F
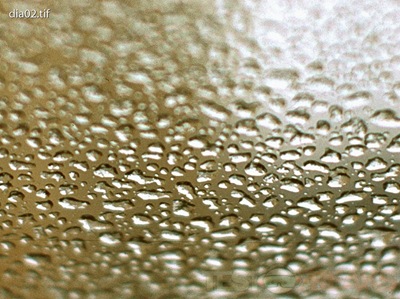
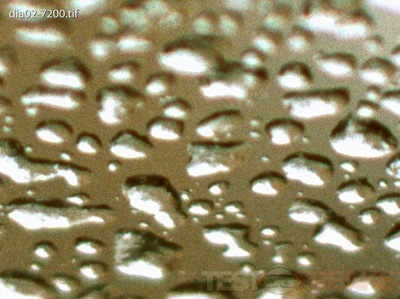
Here is a 100% crop of the same slide shot scanned at 2400 dpi and 7200 dpi. First 2400 dpi (click the images for full size):
And at 7200 dpi:
As you can see the grain of this fine grained slide film is resolved at 7200 dpi. When looking at 100% magnification, there is some noise and slight banding, but it will only show up if you are pixel peeping. The file size when using TIFF and 7200 dpi is a whopping 180MB. Overall, I am impressed with the quality of the scans.
If you need extra high quality scans, there is a function called MultiScan that will scan the same image up to 16 times and then combine the scans into one image in order to minimize noise and grain.
Scan Time
The table below shows the time taken to scan a slide image from the time of pressing Save in the Save as file dialog and seeing the image in the image viewer after a completed scan. The scanning times I am getting are quite a bit longer than the ones published by Plustek. I suspect I am not getting USB 2.0 speeds for some reason. All scans including the prescan use up about 12 seconds before the actual scanning begins, that’s included in the times below.
| Resolution (dpi) | Time (seconds) | File size (high quality JPEG) |
|---|---|---|
| Prescan | 16 | – |
| 150 | 19 | 30 KB |
| 300 | 19 | 60 KB |
| 600 | 19 | 150 KB |
| 1200 | 25 | 440 KB |
| 2400 | 45 | 1430 KB |
| 3600 | 90 | 3 MB |
| 7200 | 270 | 10 MB |
If I find the problem with my USB setup I’ll come back and update these timings.
Sound Level
The scanner is very quiet.
Ease of Use
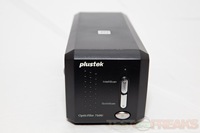
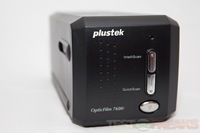
I found the scanner to be easy to use. Plus points for having a real on/off-switch and not a stand-by switch. You can start the scanning software by pressing the IntelliScan button on the front of the scanner, a nice touch.
White balance of the scanned images can be pretty hard to achieve manually, but using the white balance selector (by clicking in the middle of the Highlight-Shadow-Tool-button) makes it pretty easy. Just use the tool and select a white, gray or black part of the image to set the white balance.
Build Quality
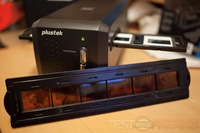
The scanner is well built and feels nice and sturdy. There are little swing doors that keep out any dust when the unit is not in use. The two included film strip holders feel solid and hold film strips of six images or four slides respectively.
Portability
The scanner is small and compact. There’s a practical bag included that you can put the scanner and its accessories in if you need to take it with you.
Bluish Cast
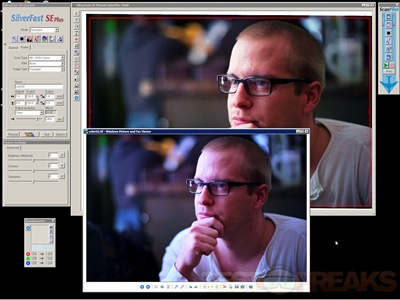
When scanning negative film, both black and white and color film, at 2400 dpi there was a bluish, magenta cast in the final image that wasn’t there in the preview. The problem didn’t appear when scanning slides. In the following screenshot the lower image is the final image and contains the bluish cast.
I tried upgrading both the scanning software and the scanner driver to the latest versions from the web. Nothing worked. After much trial and error I noticed that the cast only shows up at 2400 dpi. 2400 dpi had become my resolution of choice because of the nice trade-off between speed and resolution. However, if I scan the same image again at 3600 dpi it turns out just the way I saw it in the prescan preview. I don’t know what causes this, but at least there is a work around which is scanning at 3600 dpi. The next image was scanned using 3600 dpi.

Canon EOS 5, EF 50mm f/1.2L, Fujicolor Superia Reala
Multi-Exposure
The scanner has a function for doing multi-exposure scans to increase the exposure density. I tried the feature with the above image to try to get more information from the highlight and shadow areas.
This is the result of the multi-exposure scan:

Canon EOS 5, EF 50mm f/1.2L, Fujicolor Superia Reala
Except from being a little warmer due to different white balance settings, I can’t see much difference in the two images. Maybe there is a little more shadow detail, but it is hard to tell.
iSRD Scratch and Dust Removal
iSRD (Infrared Smart Removal of Defects) uses an extra scan with infrared light to find and remove specks of dust or scratches. It works pretty well with slides or negative color film. This is an example of before and after iSRD using slide film. The image has a big speck of dust right in the middle.

Canon EOS 5, EF 50mm f/1.2L, Fujichrome Provia 100F
This is a 100% crop of the region with the speck before and after iSRD.
As you can see the dust spot is removed in the second image.
That’s all very well. However, when I tried the same thing on black and white negative film, the results weren’t so nice. First of all the processing took a very long time to complete, with 100% CPU usage indicating that something was not right. The resulting image has some kind of digital triangle shapes in it and no dust or scratches seem to have been removed at all. See before and after iSRD:

Canon EOS 5, EF 50mm f/1.2L, Kodak Tri-X
Pretty strange and not so pretty. This is using the latest drivers and the latest version of SilverFast SE. 6.6.1r6 as of this writing.
Instead of relying on the built-in dust removal I use a dust blower and make sure my film is clean before scanning. That won’t work for removing scratches though.
Conclusion
The scanner is quiet and fast and the results are very good. The problems I had with dust removal in black and white and the bluish cast at 2400 dpi bring down the final grade a notch. But otherwise the Plustek OpticFilm 7600i SE is very nice to work with and it produces some stunning scans.
Pros:
+Easy to use
+Good image quality
+Well built in a small package
+Very quiet
Cons:
-Installer trouble
-Bluish cast in some configurations
-Strange triangle shapes with dust removal
| Grades: | |
| Overall |  |
| Design |  |
| Performance |  |
To learn more about our review policy please visit this page HERE.
About the author: I am a TestFreak with a special interest in photography. You can see some of my images on my photoblog.










6 comments for “Review of the Plustek OpticFilm 7600i SE Film and Slide Scanner”