Testing and Usage
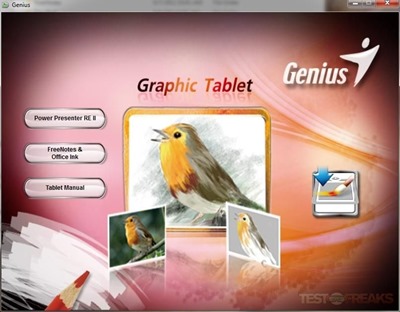
The first thing is to install the drivers so you need to pop the disc in and get started. When the program starts the drivers are clearly identified, it’s the icon on the right side all by itself. On the left side are icons to install Power Presenter, FreeNote, Office Ink and the user manual. It took less than five minutes to install everything on my Windows 7 X64 system.
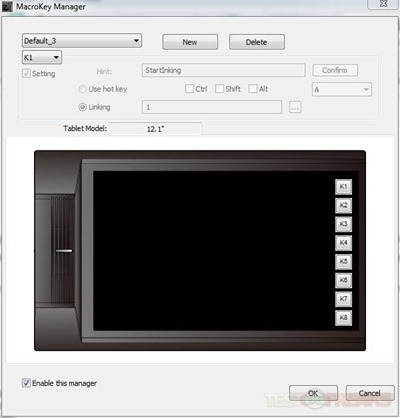
When you install the drivers, the Macrokey Manager software gets installed as well. I didn’t even notice it as it didn’t put a shortcut on my desktop, but it was in the start menu. The program will allow you to quickly and easily change the macros to how you need them.
Windows already has a built-in input for tablets like the EasyPen F610E and it hides off to the side of your screen. You can write directly onto it or use the full qwerty keyboard and just tap on the letters for input.
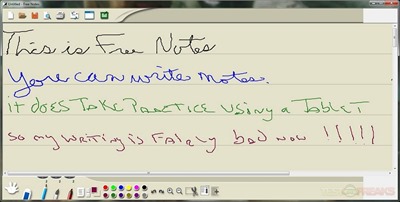
The FreeNotes program is just what it sounds like, it lets you take notes by writing them down instead of typing. (yes my writing is bad, especially with a tablet…) Once you’re done you can save them, print them or even email handwritten note.
Power Presenter puts a second taskbar above your Windows Taskbar and it’s really supposed to be used with PowerPoint and it basically makes your screen into a whiteboard for presentations. There’s plenty of options including a record one to record everything you’re doing on-screen.
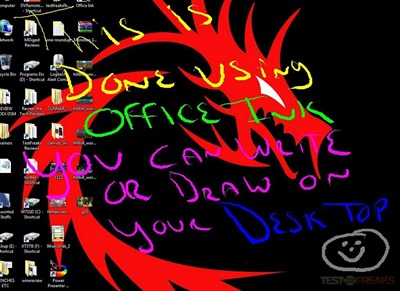
Office Ink puts a large tool bar in the bottom ride corner of your desktop with all sorts of options and what this does is it lets you write and draw all over your desktop. I think this is just great, it’s fun plain and simple. My youngest son loves it, he thinks it’s great to write and draw all over the desktop and then have it go away. Anyway, the little toolbar will let you choose between pen, brush or marker and then there’s an eraser as well and of course several different colors to choose from.
Here’s a couple examples for you:
The nice thing about this is that when you’re done your desktop goes right back to the way it was.
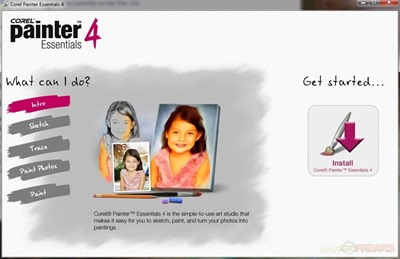
I did install Corel Painter Essentials 4 as well, just hit the button on the right side and let it do its thing.
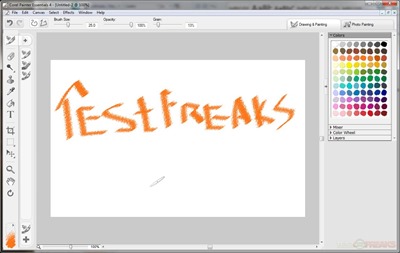
Painter Essentials 4 has two main tabs for Drawing & Painting and then one for Photo Painting. On the top is the standard command bar with plenty of drop down menus. On the right and left are more choices or options for colors, brushes etc. All in all Painter Essentials 4 isn’t bad, sure it’s not Photoshop but then everybody doesn’t need all of that. I’ve got Photoshop and I don’t use it too often honestly, I like to use simpler, lighter programs for basic stuff and this is pretty much what Painter Essentials 4 is, it’s just a lightweight program with plenty of options that you’ll find in more expensive programs. For home use I think is just fine and as a companion to the tablet it’s just fine.
Like any graphics tablet you’ll need time to adjust to using it and it can be twitchy or a bit oversensitive at times. You actually don’t even have to put the pen on the tablet for the cursor to move and this can be a bit disconcerting honestly. Any tablet like this though will require time and patience and of course practice to use it. The more you use it the better you’ll be at it, the tablet won’t instantly turn you into a wonderful artist, but it can help you on your way. I’ve been using the EasyPen for many things and I’m still not that great with it, I’m more of a pen or pencil and paper kind of guy when it comes to drawing, but I’m sure if I practiced I’d get better at it.
The pen, well actually the tablet, has 2048 pressure levels so you can really get intricate with your drawings. 2048 pressure levels is very high when it comes to tablets, the more the better though. The idea of pressure levels is to simulate what it’s like to draw or write with a pencil on paper. Push hard and you’ll get a thick dark line, push lighter and a thinner and lighter line is produced. So you can see having 2048 pressure levels really gives you choices when it comes to your drawings so they can be that much more nicer and detailed.
You can use the tablet as a mouse so if you’re using the tablet you don’t have to switch to the mouse to do what you need to do. The buttons, as I mentioned, duplicate the mouse button functions for right and left click, so this can come in handy.
The EasyPen F610E has an MSRP of about $119 but it can be found on Amazon about about $83, and for that it’s well worth it if you’re looking for a budget tablet that’s well made and has some great features.





8 comments for “Review of Genius EasyPen F610E Slim Pen Tablet”